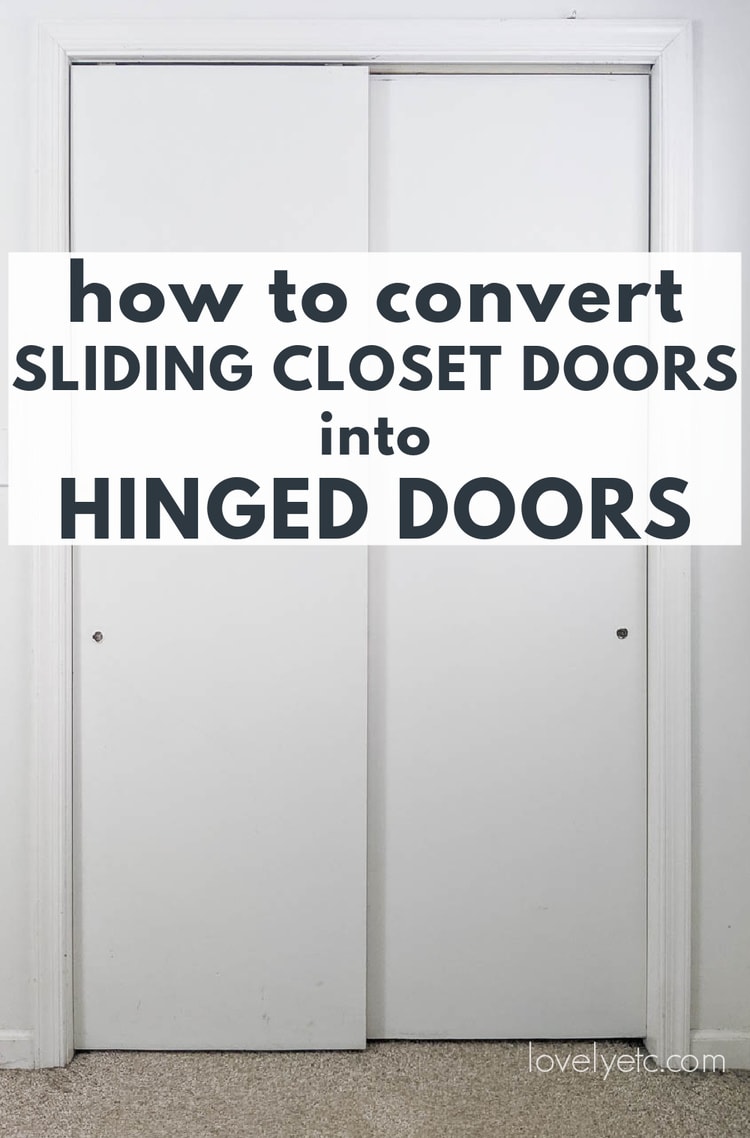
How to Turn Sliding Closet Doors Into French Doors
Today I'm sharing my gorgeous sliding closet door makeover along with everything you need to know to convert your sliding closet doors into hinged doors.
I've been wanting to give our tiny master closet an update for awhile now. It's a disorganized mess and I can't wait to whip it into shape. But before I can deal with the mess inside the closet, I knew there was another problem I needed to address first – the sliding doors.
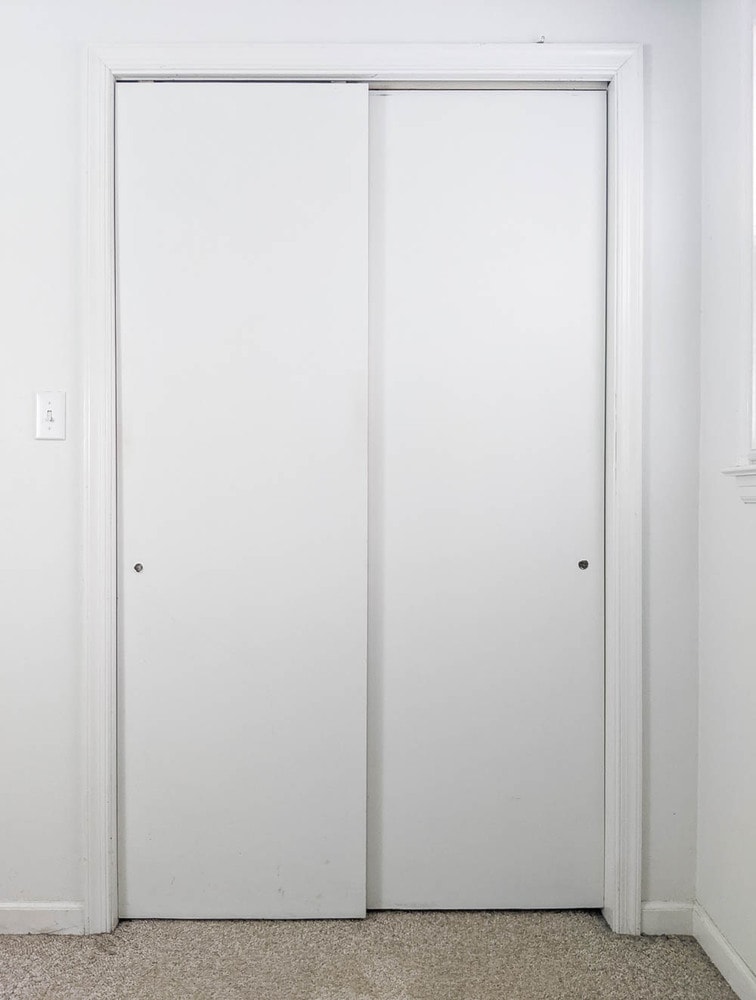
I have hated these closet doors for years. If you've ever had sliding closet doors, you probably understand why.
You can never see everything in your closet at the same time! Because of the way they overlap as they slide, you can see into one side of the closet or the other. But never the two together – so frustrating!
So I decided to make these doors work better for us.
I'm always a fan of using what you already have rather than buying new. So I got to work figuring out how to reconfigure our old sliding closet doors into hinged doors so that we could see the entire closet at one time.
And it turned out to be the perfect solution! The doors work perfectly and look beautiful! And I learned a few tricks along the way that made this project so much easier than I imagined.
This project has two main parts – the logistics of converting the sliding doors into hinged french doors and the wood plank pattern I added to make them beautiful.
In this post, I'm sharing step-by-step instructions along with a video tutorial for converting sliding doors into french doors. I have a separate post that details how to make your doors gorgeous with wood planks .
This post contains affiliate links which means if you make a purchase after clicking a link I will earn a small commission but it won't cost you a penny more. Click here to see my full disclosure policy.
Materials
- sliding closet doors
- 1″x5″ board and 1″x2″ board – these need to be long enough to go across the top of your closet door frame
- sandpaper
- 6 non-mortise hinges – using non-mortise hinges makes this whole process so much faster and easier. These hinges are the ones I used from Lowes. This set from Amazon is another good option.
- 2 magnetic catches – to hold the doors closed
- 2 door handles – I used this set from Amazon which I highly recommend. They look beautiful and were very affordable.
Tools
- crow bar – this is optional depending on how your sliding door track is installed
- circular saw – for trimming the doors to the correct size, a table saw would also work
- hammer and nails or nail gun – for attaching wood to the top of the door frame
- tape measure
- drill
How to Convert Sliding Closet Doors to Hinged Doors
Remove the sliding door hardware
The first step is to remove the doors from the track. Usually this is pretty simple. Just pull the bottom of the doors toward you a bit and then lift them off the track.
Unscrew the rollers from the top of the doors and set the doors aside.
Then it is time to remove the sliding door track from the door frame. This may be a really easy process or a huge pain depending on what type of doors you have and how they were installed.
A lot of sliding door tracks can simply be unscrewed from the door frame.
Unfortunately, my own sliding door track wasn't so easy to remove. Our house was built in the 1970s and the sliding door hardware was fully integrated into the door frame when the house was built.
I had to remove the trim from the front and back of the closet doorframe in order to access the sliding door track. And even then, it took some work to get it out.

Thankfully, things got much easier from there!
Prepare the door frame
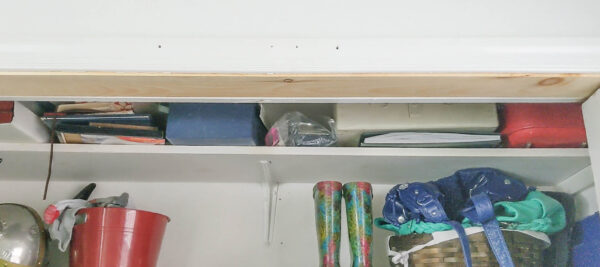
Once all of the sliding door hardware was removed, I attached a 1″x5″ board to the top of my closet door frame. This closed off the frame and gave it a nice, finished look.
(Some home improvement stores don't carry 1″x5″ boards. A 1″x4″ will also work but may leave a small gap at the back. It's a good idea to measure the width of your specific door frame before buying your wood.)
Trim the doors
Once the door frame is ready, the next step is to trim the doors down to size. Sliding doors overlap a bit in the middle, so the doors need to be cut to the correct size before they can be rehung using hinges.
To figure out the correct size for your doors, measure the width of the inside of the doorframe. Subtract 3/8″ from that number and divide it by two. That will give you the width each door should be so there is enough extra space for the hinges and to allow the doors to open and close freely.
It's important to trim the same amount from each door to keep the doors looking balanced.
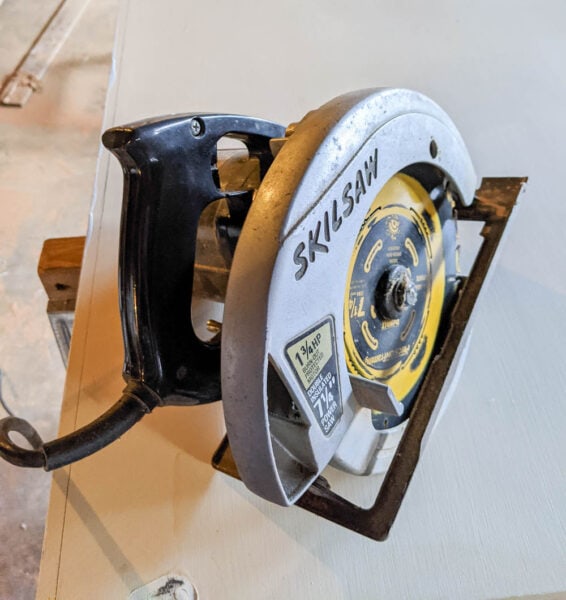
Measure the amount you need to cut from one edge of the door and use a straight edge to draw a line there. Then carefully cut along this edge with a circular saw. Repeat for your second door.
Be sure to sand any rough edges before hanging your doors.
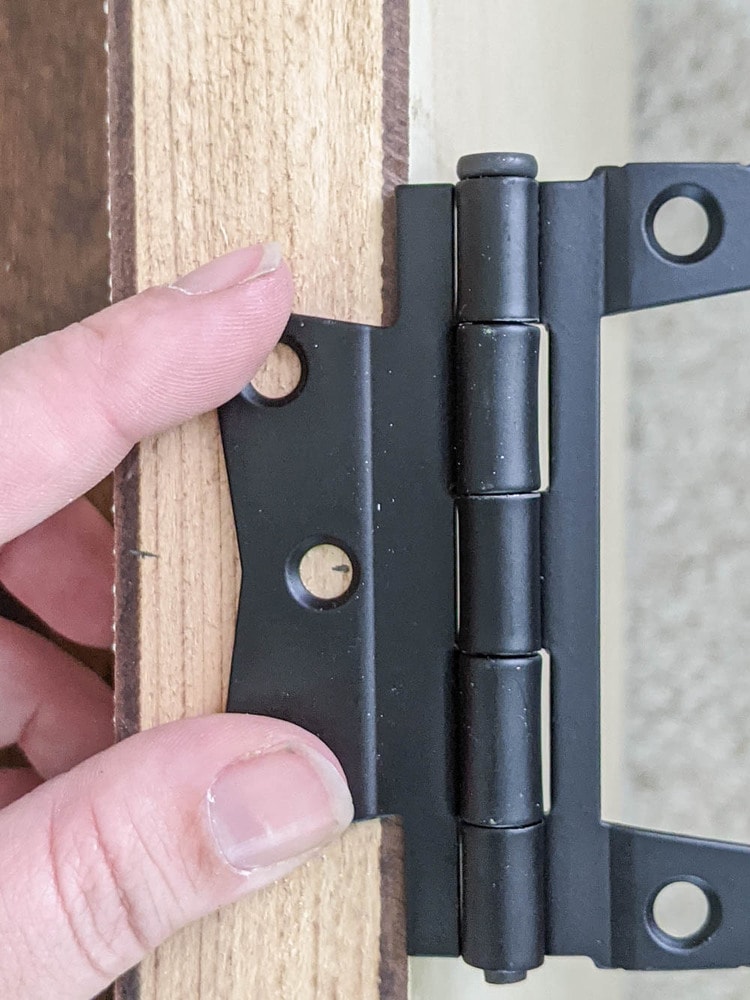
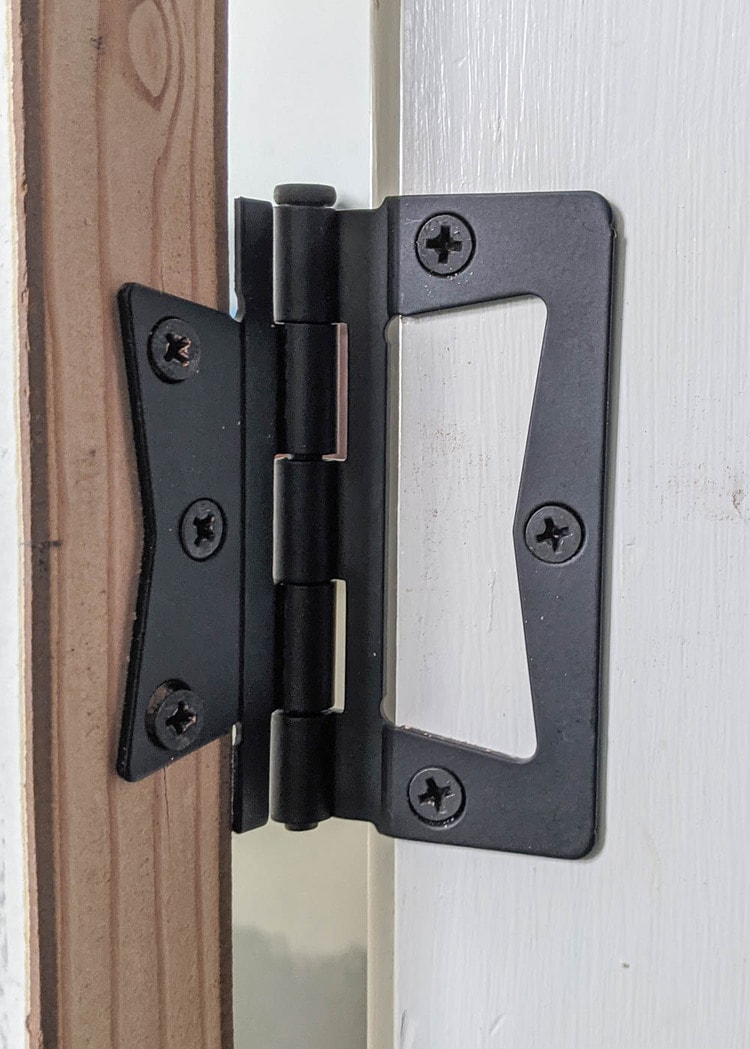
Non-mortise hinges
Now you are ready to hang your doors! I was nervous about this part of the project because this was my first time hanging a door, but it was actually really easy.
One of the best decisions I made for this project was the decision to use non-mortise hinges .
Traditional door hinges require you to chisel out a section of both the door and the door jamb so the hinges fit correctly. With non-mortise hinges, you can skip the chiseling!
The hinges are shaped so that the two pieces nest within one another making the entire hinge much thinner than a traditional hinge.
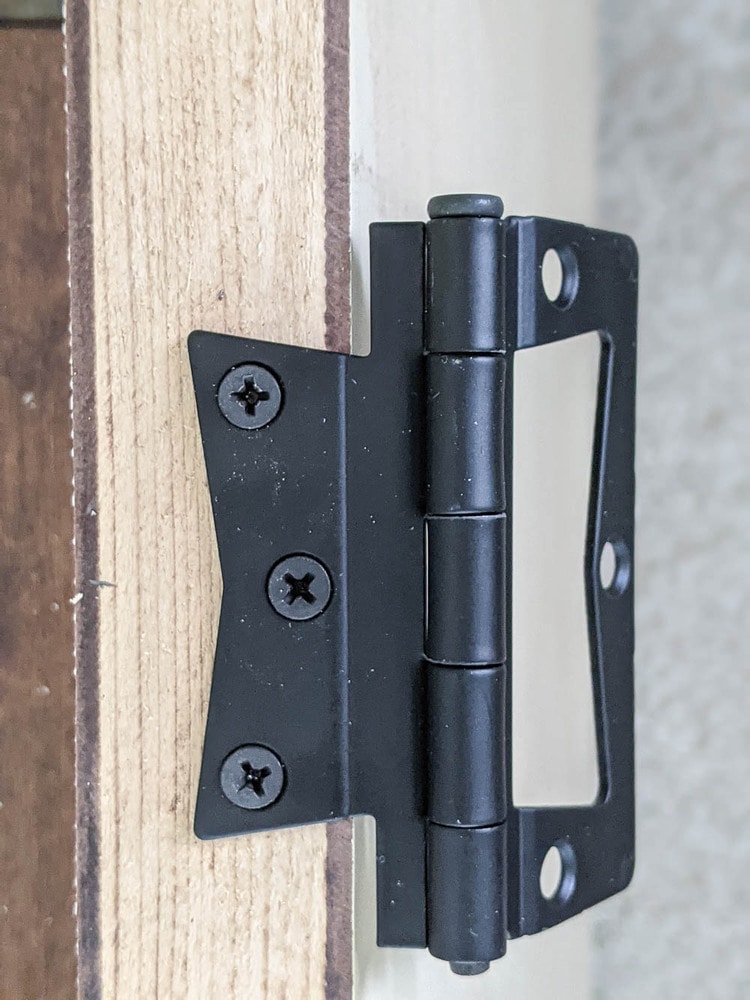
Non-mortise hinges can't hold as much weight as traditional hinges, so you may not be able to use them if your door is extra heavy. My doors were well within the weight limit though. The hinges I used specified that you could hang doors up to 50 pounds if you used two hinges and doors up to seventy-five pounds if you used three.
Even though my doors are nowhere near 75 pounds, I chose to use three hinges for each door. This also gave me a bit of wiggle room since I knew I wanted to add wood planks to the front of the door which would add a bit more weight.
Attach the hinges
Before attaching the hinges, you need to take a few measurements to figure out the placement. I just used another door in my house as a guide and attached my hinges at the same heights.
Attaching the hinges to the door is super easy. Lay your door on the ground with the side where the hinges will go facing up. Mark where the first hinge needs to go.
Hold the hinge in place and predrill holes for the screws. Then simply screw the hinge to the door.
Repeat for the other two hinges.
Hang the doors
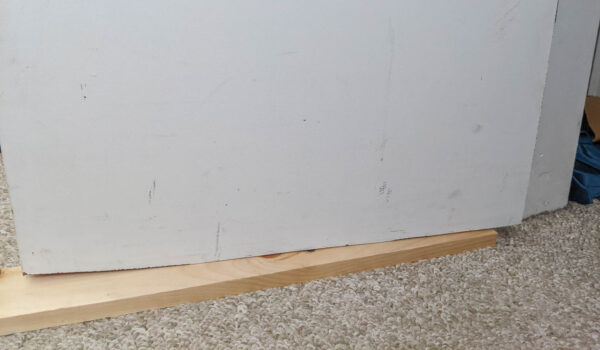
Hanging the doors is as simple as screwing the other side of each hinge to the door jamb. But before you start, make sure that your door is at the correct height; you don't want your door dragging on the ground each time it's opened.
I used a piece of scrap wood that was 3/4″ thick to hold my door up to a good height while I attached the hinges. This made it so much easier to hang these doors without a second pair of hands.
Once the door is in position, all you need to do is predrill the holes and screw the other side of each hinge to the door frame.
Add catches
Once the doors are hung, there are just a couple of final details to take care of to make sure they work well.
To make sure that my closet doors wouldn't swing too far into the closet, I added a 1″x1″ piece of wood to the top of the door frame. (A 1×2 would also work well). I nailed it directly into the upper door frame directly behind where the doors close.
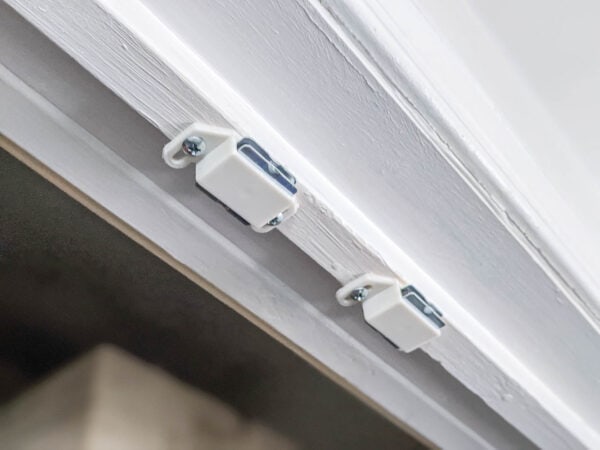
Then to make sure the doors didn't swing open randomly, I added two magnetic catches to the top of the door frame as well. A lot of people use ball catches to hold closet doors like this closed, but I read quite a few reviews that said they don't work very well and wear down easily. Then I found this youtube video that recommended these magnetic catches instead and I'm so happy I did.
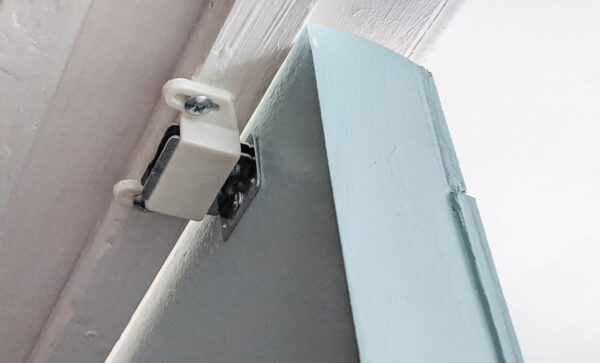
The magnetic catches are super cheap at around a dollar each, they are extremely easy to install, and so far they are working great.
Add the handles
Finally add the handles of your choice. I ordered these handles from Amazon and I'm pretty happy with them. They look great and were a great price.
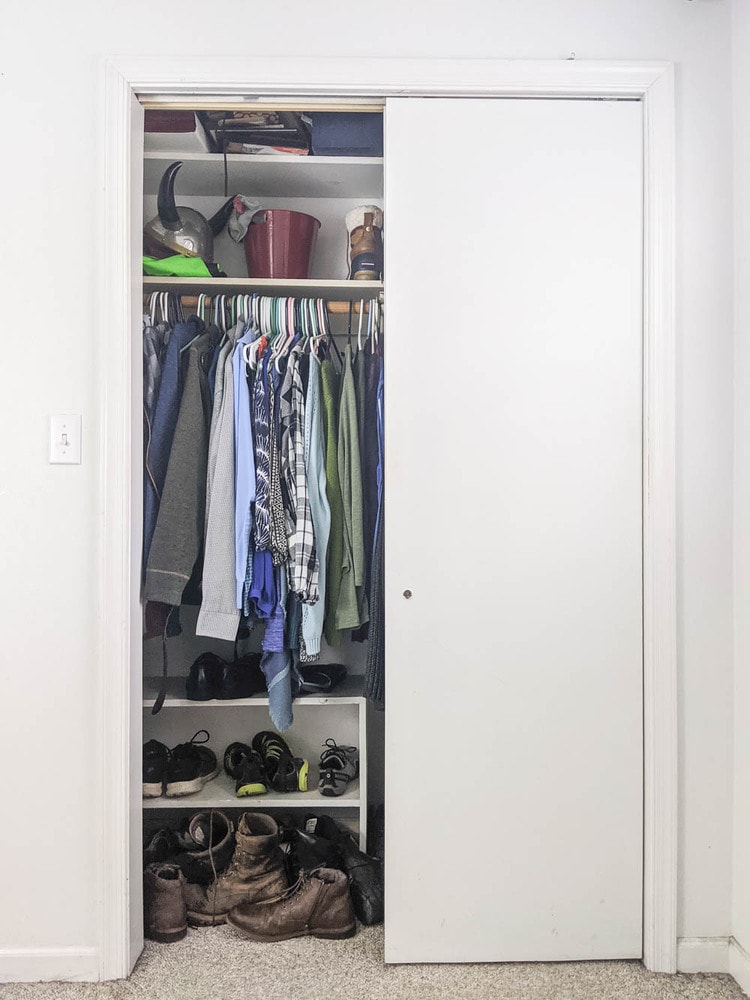
Here's how the doors looked once they were hung and ready to use (pre-handles).
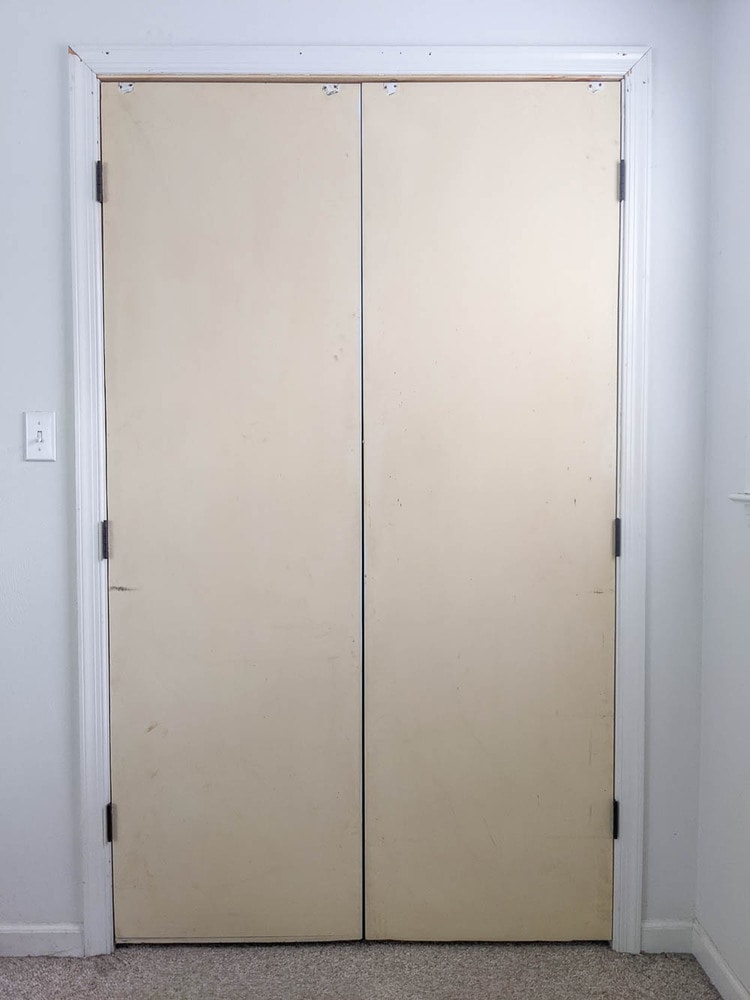
So much more functional! But still kind of ugly.
So I continued the makeover with a beautiful chevron wood plank pattern and some fresh paint. You can see the full tutorial for that part of the project here , but in the meantime here's a sneak peek of the final results.
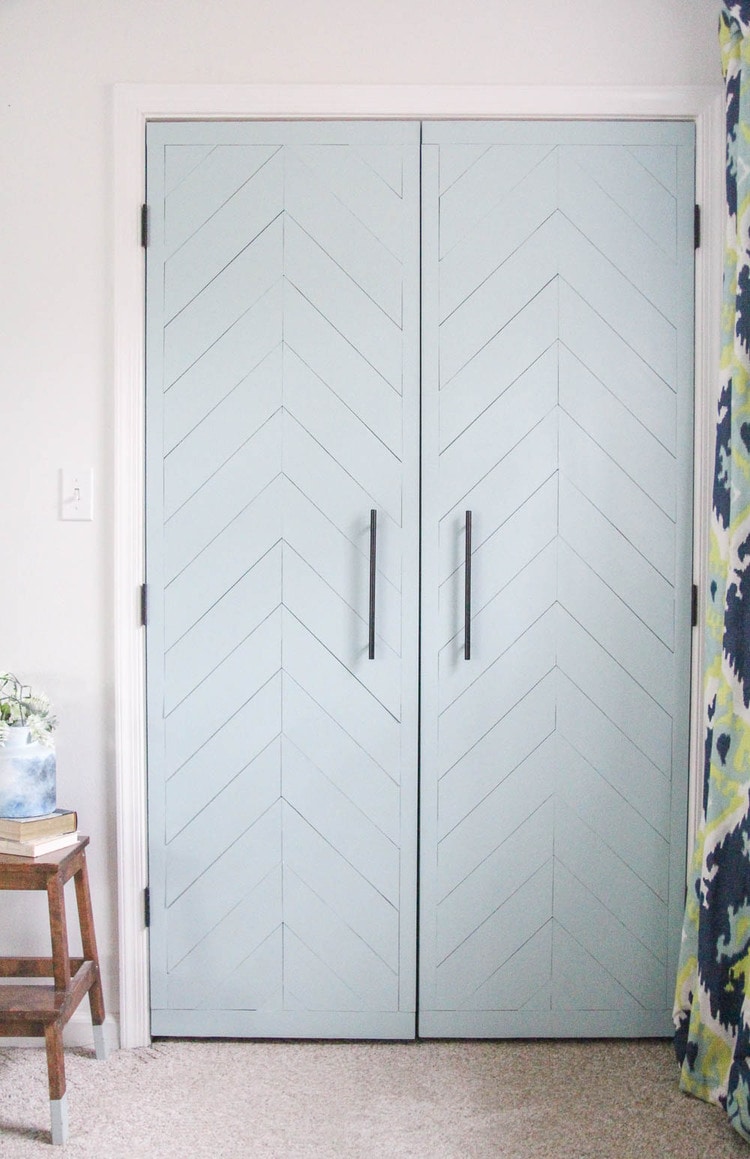
Wow! Would you have ever guessed these are the exact same doors after a bit of a makeover?!
Time and Cost
This portion of the project – converting the sliding doors to hinged doors – was surprisingly easy! It took about two hours to finish hanging the closet doors and would have been even faster if my sliding door track hadn't been such a beast to remove.
It was also incredibly affordable. The hinges, door handles, magnetic catches, and wood for the wood frame cost around $30 total. Not bad for such a big transformation!
Video Tutorial
I'd love for you to subscribe to my Youtube channel !
You can find the full tutorial for the second part of this project, adding the awesome wood plank design, right here .
And here are a few other DIY ideas I think you'll also love:
- How to build a simple inexpensive DIY closet organizer
- How to DIY a herringbone wood wall on a budget
- How to build cheap and easy DIY closet shelves
- Cheap and easy board and batten tutorial
I'd love for you to pin this post on Pinterest!

Materials
- sliding closet doors
- 1″x5″ board and 1″x2″ board – these need to be long enough to go across the top of your closet door frame
- sandpaper
- 6 non-mortise hinges – using non-mortise hinges makes this whole process so much faster and easier.
- 2 magnetic catches – to hold the doors closed
- 2 door handles
Tools
- crow bar – this is optional depending on how your sliding door track is installed
- circular saw – for trimming the doors to the correct size, a table saw would also work
- hammer and nails or nail gun – for attaching wood to the top of the door frame
- tape measure
- drill
Instructions
- Remove the doors from the track.
- Unscrew the rollers from the top of the doors and set the doors aside.
- Remove the sliding door track from the door frame.
- Attach a 1″x5″ board to the top of the closet door frame.
- To trim the doors to size, measure the amount you need to cut from one edge of the door. Use a straight edge to draw a line there.
- Carefully cut along this edge with a circular saw.
- Repeat for your second door.
- Sand any rough edges before hanging your doors.
- To attach the hinges to the door, mark where the first hinge needs to go. Hold the hinge in place and predrill holes for the screws. Screw the hinge to the door.
- Repeat for the other two hinges.
- Hang the door by predrilling holes and screwing the other side of each hinge to the door jamb.
- Add a 1″x1″ piece of wood to the top of the door frame to keep the doors from opening inward. Nail it directly into the upper door frame behind where the doors close.
- Add two magnetic catches to the top of the door frame.
- Add the handles of your choice to the doors.
Recommended Products
As an Amazon Associate and member of other affiliate programs, I earn from qualifying purchases.
-

BLACK+DECKER 20V MAX Cordless Drill / Driver, 3/8-Inch (LDX120C)
-

CRAFTSMAN Tape Measure, 25-Foot (CMHT37325S)
-

SKIL 5280-01 15-Amp 7-1/4-Inch Circular Saw with Single Beam Laser Guide
-

Spec Ops - SPEC-D15BAR Tools 15" Flat Pry Bar Crowbar, Curved Rocker Head, Teardrop Nail Puller, High-Carbon Steel, 3% Donated to Veterans, Black/Tan Black/Tan
-

FURNICA 2X White Magnetic Cabinet Door Catches/Latches + Fixing Screws
-

Aibrit 4 Inch Flush Door Hinges, Non Mortise Hinge for Heavy Door, 6 Pack, Black
-

Fandeli Assorted Grits (80,120,220), sandpaper sheets, multipurpose for furniture, wood, metal, "9x11", 25 sheet pack
-

Probrico (5 Pack) 10" Center to Center Black Modern Cabinet Pulls Stainless Steel Cabinet Hardware Bedroom Drawer Pull Kitchen Cabinet T Bar Handle Dresser Pulls
Google Web Story: How to Transform your Sliding Closet Doors
How to Turn Sliding Closet Doors Into French Doors
Source: https://www.lovelyetc.com/how-to-transform-your-sliding-closet-doors/
0 Response to "How to Turn Sliding Closet Doors Into French Doors"
Post a Comment